Most rental bedrooms have one thing in common: not enough closet space. You get a single rod and a shelf, maybe a bi-fold door that's been off-track since 2019, and that's it. You can't cut a new hole in the wall. You can't install a closet system without losing your deposit. So everything piles up on the floor, on chairs, on the foot of the bed, until the room feels smaller than the lease says it is.
A freestanding wardrobe closet solves this without touching a single wall. The Neprock Portable Freestanding Closet (ASIN B0B8C8819Q) is the one I set up in my spare bedroom three months ago, and the process took me 35 minutes with no tools. This guide walks you through the same five steps I used, from measuring the spot to loading the last shirt, so you don't waste time figuring it out yourself.
Running out of closet space but can't drill into rental walls?
The Neprock Portable Freestanding Closet assembles in under 45 minutes with no tools, holds a full wardrobe's worth of hanging clothes, and comes back apart when you move. 4.3 stars from 2,067 renters who needed the same thing.
Amazon Check Today's Price on Amazon →Step 1: Measure the Space Before You Open the Box
Don't skip this. The Neprock frame footprint is 63 inches wide by 18.5 inches deep. Before you touch the packaging, grab a tape measure and confirm you have at least 66 inches of wall clearance (three inches of breathing room on each side keeps it from looking crammed) and that the depth won't block a door swing or a drawer pull from a nearby dresser. I initially planned to put mine in a bedroom corner, but the depth would have blocked the closet door. Moved it four feet down the wall and everything cleared fine.
Also measure height. The assembled Neprock stands 67 inches tall. If you have eight-foot ceilings you're fine. If you have a sloped ceiling or a low soffit, check the tallest point in your intended spot before assembly. Angled ceilings in older rentals have tripped up a lot of people. The last thing you want is to assemble the whole frame and then discover it doesn't fit the room.
Write your measurements down: wall width available, depth clearance, ceiling height. Pin them to the side of the box with a piece of tape. It takes two minutes and saves you disassembling a half-built frame because you eyeballed it wrong.
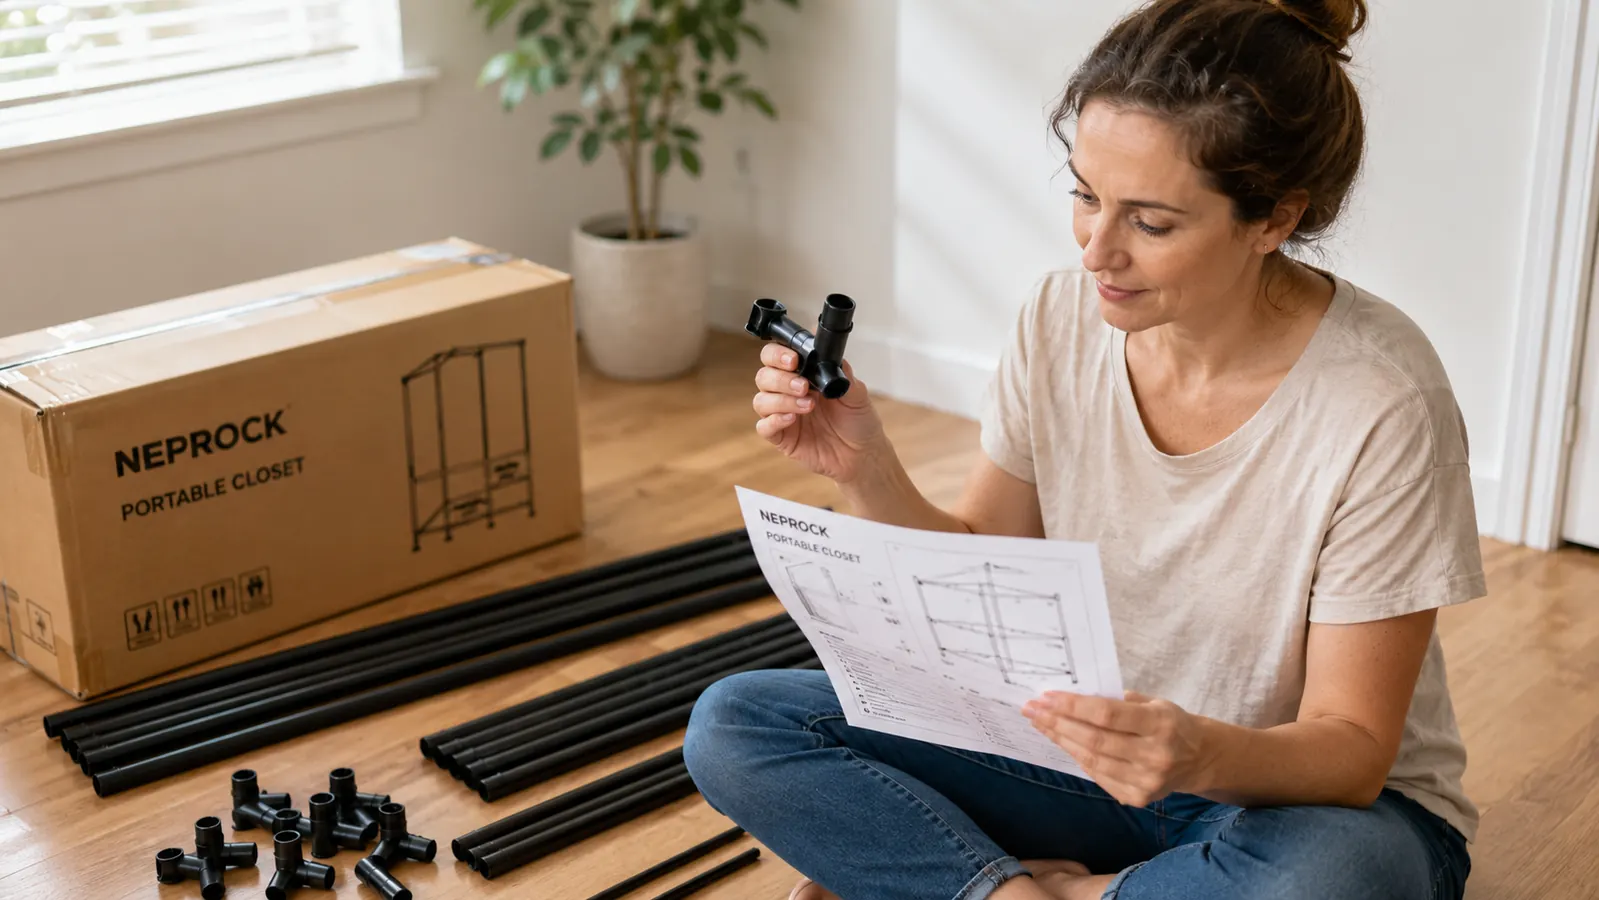
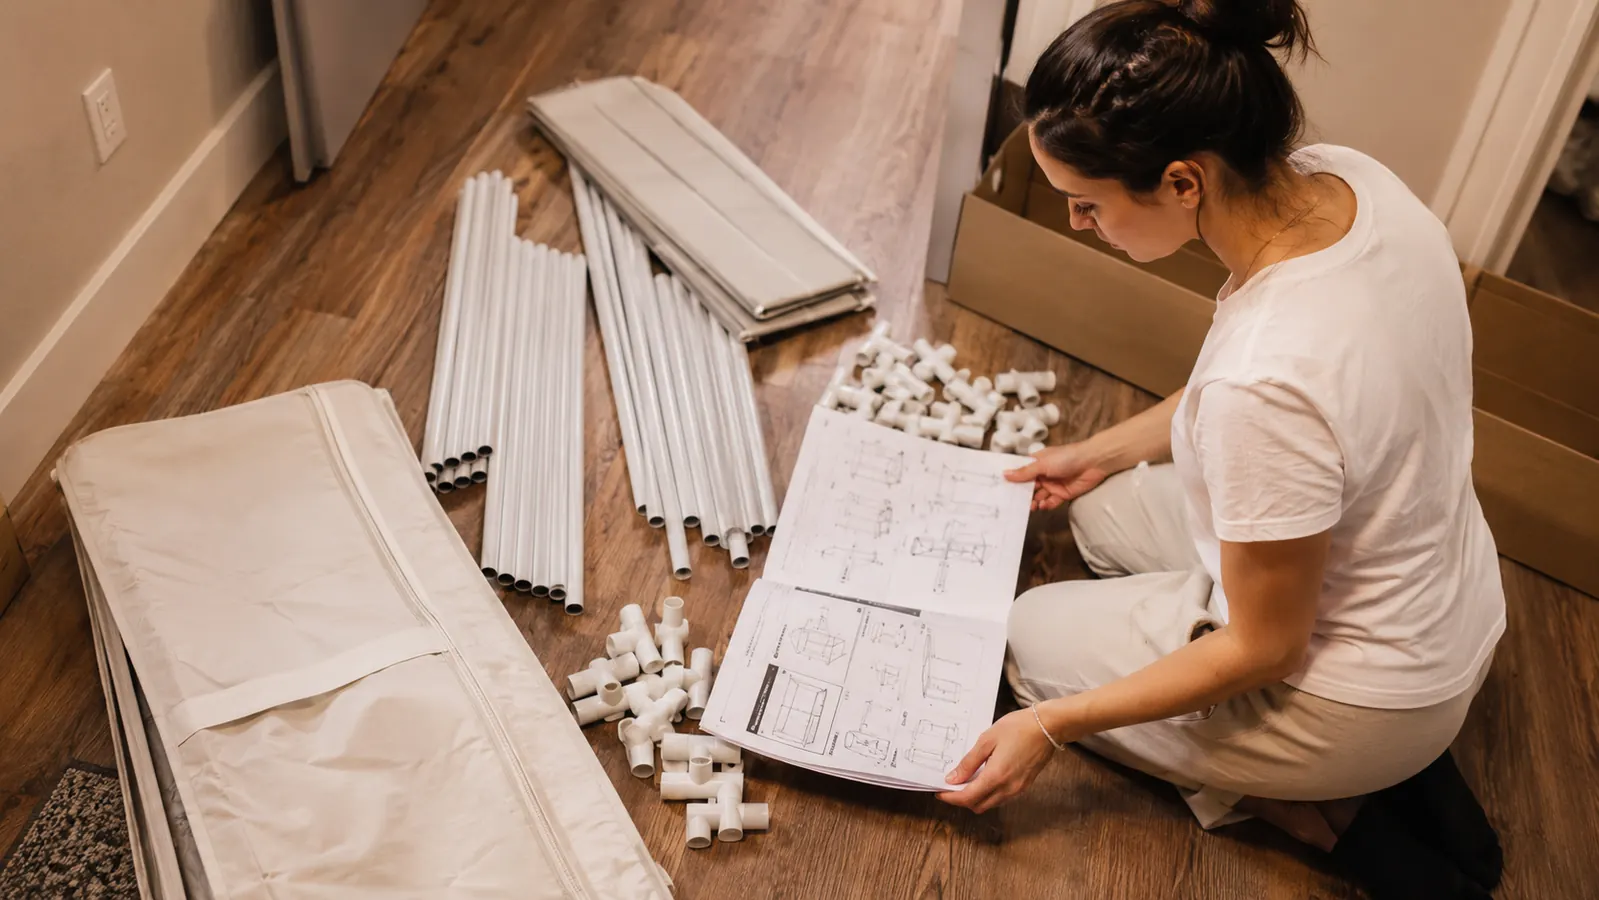
Step 2: Sort the Parts Before You Start Connecting Anything
Open the box on the floor and lay every piece out flat. The Neprock ships with vertical posts, horizontal cross-bars, connector joints, the hanging rod, a top shelf bar, and a lower shelf platform. Count them against the parts list in the manual before you start. I had one connector joint loose in the corner of the box that I almost missed. Finding a missing part after you're halfway through assembly is genuinely annoying.
Group similar pieces together. Stack the vertical posts in one pile, cross-bars in another, connectors in a third. The frame goes together fast once you know what's what, because every joint is a snap-fit or a twist-lock. There are no nuts and bolts, no Allen wrench, nothing that requires force. If a piece won't seat, you're probably at the wrong angle. Rotate the connector a quarter-turn and try again.
Having the cover on the Neprock is optional. It comes with a dust cover that zips over the top and sides. If your rental has central air or a ceiling fan that pushes dust around, use it. If you want the clothes to be visible, skip it. The frame is stable either way.
Step 3: Build the Frame from the Base Up
Start with the two long side-panel uprights lying flat on the floor. Connect the bottom cross-bar between them first, then the lower shelf supports, then stand the base assembly upright. Having a second person to hold the frame vertical while you connect the upper cross-bars is genuinely useful here. I did it solo and kept knocking one side over. It's doable alone, but slower.
Once the main frame is standing, slide in the hanging rod. On the Neprock this is a smooth steel bar that rests in notched brackets at each end. No fasteners needed. Press it down until it seats in both notches, give it a gentle tug to confirm it's not going anywhere, and move on. The rod is rated to hold substantial weight once the frame is fully assembled and stable.
Finish by snapping in the top shelf bar and the lower shelf platform. The lower shelf is where most people will keep shoes, folded items, or bins. Check that all four feet touch the floor evenly before you load anything. On carpet it's fine. On hard floors, if you feel any wobble, check the connector joints at the base. One that isn't fully seated is almost always the culprit.

Step 4: Position and Stabilize Before Loading
Slide the assembled frame to your planned spot. Don't load it first and then try to move it. The frame weighs about 18 lbs empty, which is manageable. Full of clothes it's a different story. Get it exactly where you want it, then check the positioning: is the back of the frame close to the wall without touching it? Leaving one to two inches of air gap at the back is fine and actually helps with airflow if you're in a humid climate.
Freestanding closets on hard floors can creep over time from the weight of clothes swinging on hangers. If your floor is tile, laminate, or hardwood, put a pair of rubber furniture pads under the front feet. You can find them in a hardware store for a couple dollars, or cut small squares from a rubber shelf liner. This is not mandatory but it keeps the frame where you put it and avoids scuffing a floor your landlord is going to inspect when you leave.
A word on wall contact: some renters push the back of a freestanding closet right against drywall to save floor space. That's fine as long as there's nothing sharp on the frame that could scratch the paint. The Neprock's powder-coated steel has smooth ends on all the connectors. I'm comfortable with mine an inch from the wall. If you're on a short lease and paranoid about your deposit, keep it a couple inches away.
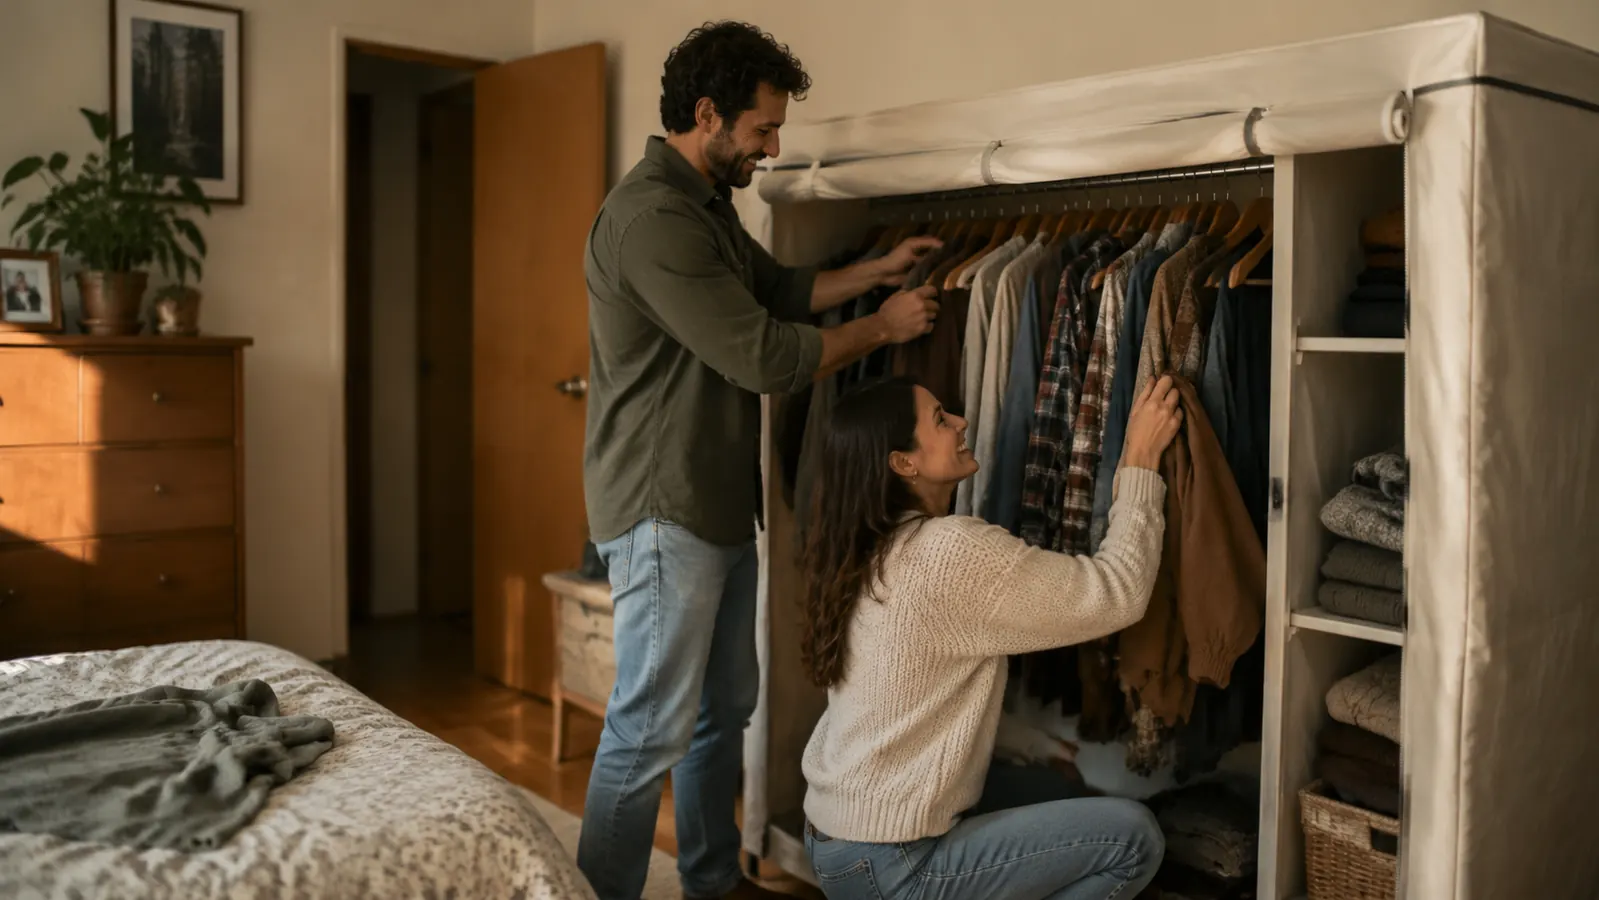
Step 5: Load It Strategically So It Stays Balanced
Load heavier items first and toward the center. Heavy coats, denim jackets, and thick hoodies loaded at the far ends of the rod put an uneven sideways pull on the frame over time. Center-load your heaviest pieces and work the lighter items outward. The Neprock's hanging rod is rated for the full width, but distributing weight evenly just makes common sense for long-term stability.
The lower shelf handles about 20 lbs comfortably. I keep two rows of shoes on mine. Three shoe boxes stacked flat, three pairs of sneakers standing upright, and a folded spare blanket at the far end. If you plan to use the lower shelf for folded clothes or small bins, consider picking up two or three small storage bins to keep things contained. Loose sweaters and jeans slide off the shelf corners with the slightest bump. A bin keeps them in place.
The top shelf area above the rod is useful for lightweight items: hats, spare hangers, a folded sheet set, a bag you reach for a couple times a month. Don't pile heavy boxes up there. High weight on a freestanding frame raises its center of gravity. Light items up top, heavy items low and centered. That's the whole loading philosophy.
The whole setup took 35 minutes, including the time I spent measuring twice before I opened the box. That's less time than most landlord repair requests take to get a reply.
What Else Helps
The Neprock closet solves the hanging-clothes problem completely. But once you have a rod full of clothes, you notice the problem shifts: the stuff that doesn't hang anywhere. Shoes overflow the lower shelf. Off-season gear needs a home. That's where stackable clear storage bins become the next logical tool. A set of Sterilite clip bins stacked beside or below the closet frame handles the overflow without adding any more wall anchors. I keep mine in two stacks next to the Neprock, and between the two the spare bedroom now holds more organized storage than the apartment's built-in closet does. See the full guide on how to organize a small closet with stackable bins if you want to extend the same renter-friendly system to your built-in space too.
Slim velvet hangers are the other quick win. If you move from plastic or wire hangers to slim velvet ones, you can typically fit 30 to 40 percent more clothes on the same rod. The Neprock's rod fits roughly 40 to 50 standard plastic hangers. Switch to slim velvet and that number climbs closer to 70. For a rental where your entire wardrobe needs to live in one room, that difference is real. If you want a deeper look at how the Neprock holds up over the long haul, the year-long Neprock review covers stability, wear on the finish, and how it handles humidity.
Get the extra hanging space without a single wall anchor
The Neprock Portable Freestanding Closet ships flat, assembles in under 45 minutes, and disassembles just as fast when you move. Solid pick for renters who need real wardrobe storage right now.
Amazon Check Today's Price on Amazon →